
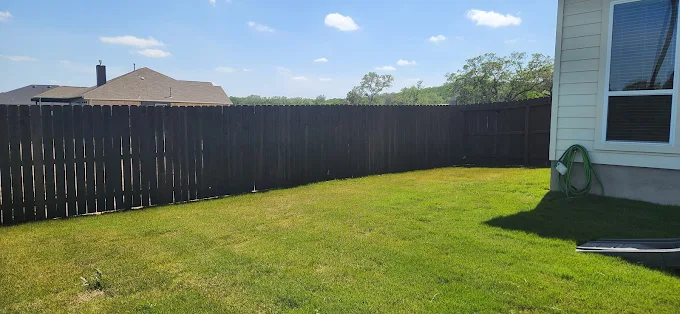
Fence Staining for Residential Fences: What to Expect
If your wood fence in Plano has started looking dull, uneven, or rough to the touch, staining can be a practical way to bring back protection and curb appeal. Here’s what typically happens from prep to finishing, plus the details homeowners should watch for before the first coat goes on.
If you’re standing in your backyard in Plano and noticing the fence looks darker in some spots, faded in others, or feels slightly “dry” compared to last year, you’re not alone. Weather and sun exposure can make wood look tired long before it actually fails.
Staining is often the next step, but the process can feel confusing from the homeowner side. This guide helps you understand what to expect during fence staining for residential fences, what decisions matter most, and how to avoid common issues that show up after the project is done.
- Quick answer
- What to check first
- Main things customers should understand
- Why this matters in Plano, TX
- Common mistakes to avoid
- Customer checklist
- Frequently asked questions
Quick Answer
Residential fence staining usually starts with cleaning and inspection, then includes repairs, surface prep, and applying the stain in a way that matches the fence’s current condition. Plan on time for drying between steps, because damp wood or leftover grime can cause blotchiness or premature wear. A practical recommendation is to ask for a clear prep plan and stain type based on what you see today (peeling, gray fading, or bare areas). If your fence is heavily damaged, staining may not be the full solution, and repair or replacement may be needed first.
What to Check First
Before staining, take a quick walk around your fence line and look for clues about what’s going on with the wood. Start with the most visible areas: ends of boards, gate sections, and spots that get the most sun or stay shaded. Those areas often show early fading, cracking, or uneven color.
Check the surface condition
Is the wood gray and weathered, still solid, or rough with raised grain? Look for flaking or peeling too, because that can change the prep approach.
Check for loose boards and hardware
If boards are shifting or gates don’t sit square, staining after repairs helps the finish look even and last longer.
Check for moisture and mildew
Any dark spots, mildew, or persistent dampness should be addressed during cleaning so stain can bond properly.
Main Things Customers Should Understand
From our day-to-day work, the biggest driver of a good-looking stain job is prep quality. Homeowners often expect the “stain color” to be the main factor, but the surface condition usually determines whether the color turns out uniform or patchy.
Professional observation: The fence boards may look “fine” from a distance, but staining reveals texture. If the wood is unevenly weathered, prep is what helps create a consistent base for the finish.
Step 1: Cleaning and inspection
Most residential staining jobs begin with a thorough cleaning to remove dirt, mildew, and loose debris. Then the fence is inspected for areas that need extra attention, such as rough spots, failing old coatings, or boards that are pulling away.
Step 2: Repairs before the first coat
If boards are warped, loose, or damaged, repairs typically come before staining. This matters because stain will not “fix” structural issues, and repaired sections should match the surrounding boards for a cohesive look.
Step 3: Surface prep for better absorption
Depending on what’s on the fence now, prep may include removing old flaking material and addressing rough grain. The goal is to help the stain absorb evenly so color doesn’t appear darker in crevices or lighter on smoother areas.
Step 4: Application and coverage
Stain is applied with attention to board edges and corners, especially around pickets and fence rails. Even coverage is where homeowners typically notice the difference between an average job and a finish that looks consistent from the street.
Step 5: Drying time and follow-up
Drying time depends on conditions and product type. After staining, it’s normal for the fence to look slightly different as it cures. A clear understanding of when it’s fully ready helps you plan around daily use of gates and backyard access.
Why This Matters in Plano, TX
Plano’s weather swings can affect wood finishes throughout the year. Sun exposure can speed up fading, while humidity and seasonal moisture can impact how stain absorbs and cures. That’s why local residential fences often benefit from a prep-and-application approach that targets uneven wear along sunny runs, shaded sections, and gate areas that get used more often.
If you’re also comparing options for parts of your property, it can help to think in systems. For example, if you’re maintaining or upgrading fencing and gates together, you’ll get better visual alignment when the color and finish approach matches across the fence line. Fence Pros of Texas can help coordinate that work, including staining with related fencing and gate needs.
| What you notice | What it usually means | What to ask about |
|---|---|---|
| Gray, faded boards with no peeling | Surface weathering likely needs cleaning and prep for even absorption | Whether extra surface prep is needed for uniform color |
| Peeling, flaking, or failing coating | Old material may interfere with new stain bonding | How they plan to remove loose material before staining |
| Dark spots or mildew | Moisture or organic growth can affect finish performance | What cleaning process addresses mildew and prevents reappearing |
| Loose boards or sagging sections | Structural movement can cause uneven wear after staining | Whether repairs will be completed before application |
| Many boards are cracked or warped | Stain may not fully hide deterioration | Whether replacement of damaged sections is recommended |
Want a stain plan that matches your fence condition?
Tell us what you’re seeing on your residential fence in Plano and we’ll help you understand what to prioritize before staining begins.
Contact Fence Pros of TexasCommon Mistakes to Avoid
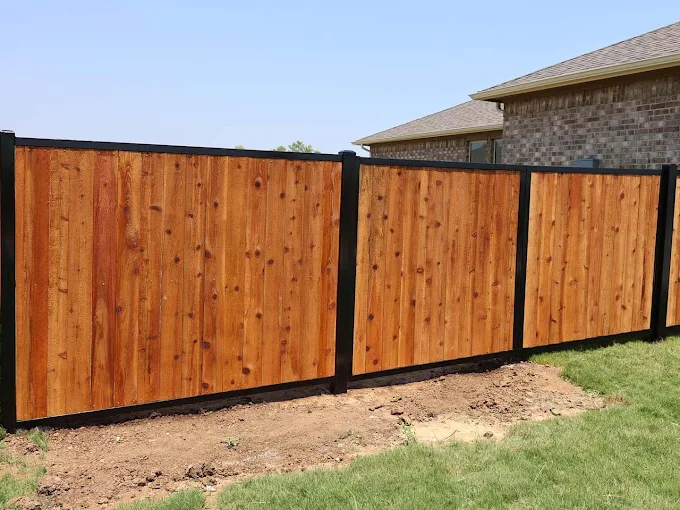
Even careful homeowners can run into predictable problems if staining starts without enough prep or if expectations don’t match the fence’s condition. Here are the issues we see most often and how to prevent them.
- Skipping cleaning, which can trap dirt and cause uneven color.
- Staining over loose or peeling material, leading to poor adhesion and faster wear.
- Ignoring repairs, which can result in boards shifting and the finish looking inconsistent later.
- Choosing a color without considering how the fence is weathered today, since gray aging can affect appearance.
- Rushing drying time, which may impact how evenly the stain sets across boards.
Customer Checklist
Before you schedule residential fence staining, use this checklist to make sure the project is set up for a durable, even finish. It’s also useful if you’re comparing options for fence materials like wood fences, privacy fence installation, or decorative fence installation.
Practical recommendation: If you can, take a few photos of the fence in different lighting (morning and afternoon). That makes it easier to discuss prep needs and expected color results.
- Confirm the current fence material and condition (solid, weathered, peeling, or damaged).
- Ask how the team will clean and prep the surface for even stain absorption.
- Identify any boards, rails, or gate sections that need repair before staining.
- Discuss the stain approach for high-sun areas and shaded sections.
- Clarify drying time expectations and when the fence is ready for normal use.
- Make sure the plan covers the full fence line you want stained, including gate areas.
A representative scenario from a Plano home
A homeowner in Plano noticed their wood fence had turned patchy: some boards looked darker and others looked lighter, with rough texture where the sun hit most. The fence line also had a few loose boards near a gate that was used daily. The staining plan focused on cleaning first, then repairing the loose sections so the boards stayed aligned. After prep for uneven weathering, the stain application was completed with attention to edges and corners, resulting in a more uniform look along the entire residential fence line.
Frequently Asked Questions
How do I know if my fence should be stained or repaired first?
If boards are loose, sagging, or cracked enough to move, repairs usually come before staining. Stain can improve appearance and protection, but it cannot correct structural issues. A quick inspection of gate alignment and board stability is the easiest starting point. If peeling or failing old material is present, that also tends to require prep and repair planning. A staining-focused contractor can help confirm whether the fence is ready for stain or needs additional work to make the finish last.
Will staining fix faded or gray-looking wood?
Staining can often restore color richness, especially when the fence is simply weathered. However, the final look depends on surface condition and prep. Gray fading can mean the top layer has changed, and stain typically needs a clean, properly prepped surface to absorb evenly. If there is peeling or loose material, prep is even more important. Asking how they address uneven weathering helps you understand what level of color improvement is realistic.
How long does a residential fence staining project usually take?
Time varies based on fence length, current condition, and how much repair or prep is needed. Cleaning, addressing problem boards, and allowing appropriate drying time between steps are common parts of the schedule. Rather than only focusing on “days,” it’s helpful to ask what happens each day and what drying windows they plan for. That way you can plan around gate use and backyard access without guessing.
Can I stain a fence that already has stain or an old finish on it?
Often, yes, but it depends on whether the existing finish is stable. If older stain is peeling or flaking, it may interfere with how new stain bonds and can lead to patchy results. Prep steps may be required to remove loose material and smooth the surface so the new finish applies evenly. When you discuss your fence, mention any visible flaking, rough spots, or areas that look different from the rest.
Do you also help with other fence types besides wood fences?
Fence Pros of Texas works across fence and gate needs, including fencing materials such as aluminum fences, chain link fences, vinyl fences, and wrought iron fences. If your project includes both staining and upgrades, it can be helpful to map out the full scope so everything matches visually. For example, a residential fence line with gates may need attention to both fence boards and gate hardware, especially if you’re aiming for consistent curb appeal.
Ready to refresh your residential fence in Plano?
Fence Pros of Texas can help you understand what to prioritize so your staining project looks even and holds up. Call or reach out to discuss your fence and gate details.
(210) 707-1616
Fence Pros of Texas
Fence Pros of Texas serves homeowners and property owners in Plano, TX and the surrounding areas with fence and gate services that fit real residential needs. Whether your project involves residential fence installation, fence repair, fence replacement, or fence maintenance, we focus on practical prep, careful finishing, and a clean final look across your fence line.
If you’re planning work beyond staining, you can explore related options such as residential fencing, residential gates, and railing services.