
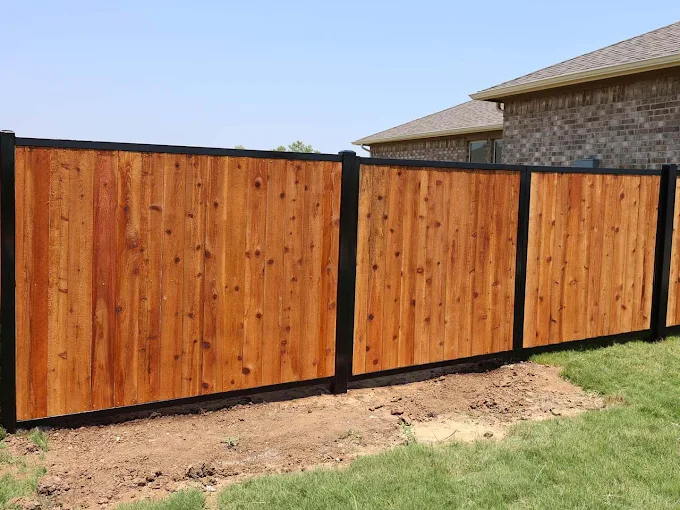
Fence Staining Tips for Long Lasting Beauty
If you’ve got an older wood fence in Plano that looks great one season and tired the next, you’re not imagining things. In North Texas, fences take a beating from intense sun, driving rain, and long dry stretches that cause wood to expand and contract. We frequently see homeowners who stain for curb appeal—then wonder why the fence starts looking dull, blotchy, or uneven a year or two later.
Staining isn’t just about color. Done right, it protects the wood, slows moisture intrusion, and helps the fence stay straight and strong. Done halfway, it can trap moisture in the boards and accelerate wear.
Quick Answer
For long-lasting beauty, stain only after the wood is properly cleaned and dried, use the right stain type for your fence condition, and don’t skip prep. In North Texas, the biggest difference-maker is correct surface preparation (cleaning and sanding where needed) plus weather-friendly timing—typically late spring or early fall. For best results, plan for drainage around posts and use a system that matches the wood’s current condition. If your fence posts are moving or the pickets are loose, staining won’t fix the underlying structure—repair or replacement comes first.
What We Commonly See in North Texas Fence Installations
Here’s a real scenario we run into often:
A Plano-area homeowner has a privacy fence that’s about 6–8 years old. The boards are sun-faded and slightly gray, and a few panels look darker where rain sits longer. They want a “fresh, rich brown” look and schedule staining quickly.
When we inspect the fence, we usually find the real issue isn’t the stain—it’s the mix of conditions:
- some boards are weathered and porous (they drink stain unevenly)
- other boards have old coatings or mildew growth that needs full removal
- certain areas stay damp because of grading near the fence line
That’s why staining success is mostly prep work and planning.
A firsthand contractor observation
One of the quickest ways to tell whether staining will last is to look at how water behaves on the boards. If water beads up evenly, the surface may still have leftover finish or contaminants. If it soaks in fast and unevenly, the wood needs cleaning and light abrasion before coating. When we skip that step, stain often ends up patchy—especially in corners and near the ground where moisture lingers.
Why Some Fence Systems Fail Early
Most early failures come down to one of three things:
1. Moisture trapped under the stain
- If the fence is still damp, or if old finish wasn’t removed well, staining can lock in moisture and speed up deterioration.
2. Incompatible coatings
- Not all stains play nicely with old layers. A solid “opaque” stain over a certain type of coating, or vice versa, can cause peeling or a chalky surface.
3. Structural movement
- If posts are too shallow, concrete wasn’t sealed properly, or soil shifting pushed the fence out of alignment, you’ll see gaps and warping. Stain can’t compensate for movement—at best it will highlight it.
Mistakes That Reduce Fence Lifespan
Common mistake property owners make
Staining over a fence that wasn’t cleaned and dried properly.
We see this a lot after a rainy stretch. Homeowners wait for the boards to “look dry” but the wood fibers can still hold moisture, especially in dense grain or shaded sections. When that trapped moisture heats up under Texas sun, it can cause uneven absorption and faster breakdown.
Other frequent mistakes include:
- Skipping sanding or abrasion on weathered areas (the stain won’t bond well)
- Using the wrong product for the current surface (especially if there’s old finish residue)
- Staining in harsh midday heat (solution flashes off too quickly and can lead to streaking)
- Not protecting the bottom edge of pickets and rails where water splash hits most
Installation, Repair, or Maintenance: A Staining Checklist That Works
Before stain ever touches the fence, think like a contractor: prep, protect, then coat.
Fence Maintenance Checklist (Prep to Finish)
Use this sequence for best results:
1. Inspect the fence
- Look for loose boards, failing rails, soft spots, and areas of rot.
- Tighten hardware and replace damaged sections before staining.
2. Clean thoroughly
- Remove mildew, dirt, and old residue.
- For mold/mildew-prone areas, use an appropriate cleaner and scrub with pressure-friendly technique (not aggressive enough to gouge wood).
3. Let it dry completely
- North Texas weather can be deceptive—wood may feel dry on top while moisture remains underneath.
- A practical rule: wait for a stretch of dry, mild weather and confirm the surface is dry to the touch throughout.
4. Sand only what needs it
- Light sanding evens out rough grain and improves stain bonding.
- Don’t over-sand thin rails or heavily worn boards.
5. Test a small area
- Pick an inconspicuous section and apply stain to see absorption and color consistency.
6. Choose the right application method
- Brush for edges and tight spots.
- Use a roller or sprayer only if you can apply evenly without overspray and drips.
7. Apply two coats when recommended
- Many stains look great after one coat but need a second for consistent protection.
8. Mind the cure time
- Keep sprinklers away and avoid heavy rain exposure during the recommended cure window.
Recommendation: match stain to the fence condition
- Weathered gray wood: typically benefits from thorough cleaning and bonding prep before staining.
- Previously stained wood: focus on compatibility—if residue is present, you may need more careful cleaning or stripping.
- High-splash areas (near sprinklers or downspouts): consider extra attention to bottom rails and lower pickets.
If you’re also planning upgrades beyond staining—like improving privacy or security—our team can help you map the right approach. You may want to review residential fencing solutions to see how material choice affects long-term appearance and maintenance.
Optional Comparison: Stain Types (When Each Makes Sense)
| Stain Type | Typical Look | Best For | Main Tradeoff |
|---|---|---|---|
| Transparent | Natural grain, lighter coverage | New or lightly weathered wood | Less protection against heavy sun/harsh moisture |
| Semi-Transparent | Visible grain, richer color | Weathered boards that are still in good shape | Requires good prep for even absorption |
| Solid Stain | More uniform, opaque color | Heavily weathered wood or uneven tone | Can obscure grain; prep and compatibility matter a lot |
If you’re unsure which one matches your fence’s current condition, a quick on-site assessment saves time and prevents the “why does it look blotchy?” problem.
Plano or North Texas Relevance: What Changes Here
North Texas weather doesn’t just affect how fences look—it affects how they behave.
- Hot sun and fast drying: Drives rapid evaporation, which can cause uneven staining if applied at the wrong time of day.
- Rain followed by dry cycles: Pushes moisture in and out of the boards, which is why cleaning and complete drying are crucial.
- Soil movement and grading: In some Plano backyards, the fence line sits near areas that drain toward the property boundary. That creates consistently damp zones—often where discoloration starts first.
One of the most practical things we do during fencing work is check drainage behavior around the fence line. If water pools at the base, staining alone won’t stop the cycle.
A Real (Anonymized) Project Example: “Why the Stain Didn’t Stick—Then It Did”
We recently worked with a homeowner whose wood privacy fence had dark streaks near the lower rails and a patchy appearance after a previous staining attempt. The boards were weathered and had mildew in shaded sections. A few panels also had slight looseness where rails had shifted.
Our approach:
- repaired loose rails and replaced a few damaged boards first
- cleaned and treated mildew thoroughly
- sanded only where the surface was uneven
- stained in cooler, drier conditions and applied evenly to edges and bottom rails
Result: the fence looked richer and more consistent, and the homeowner noticed fewer new dark spots forming in the first months after the project.
That’s the difference between “a fresh coat” and a system designed to last.
Signs Your Fence Needs Repair (Before You Stain)
If you notice any of the following, don’t rush into staining:
- boards that feel soft or crumbly when pressed
- visible rot near the fence bottom or rail joints
- loose pickets or rails that move easily
- widespread warping or leaning panels
- peeling or flaking finish already on the wood
If your goal is to keep privacy and curb appeal while preventing repeat work, repairing first is almost always the smarter path.
For homeowners comparing wood and other perimeter options, you might also want to consider commercial fencing principles—especially around structure and security planning—even if your project is residential.
What Property Owners Should Know
Staining is a finishing step, not a foundation fix. The longevity of your fence comes from the whole system:
- correct cleaning and drying
- compatible stain selection
- solid rail and post support
- drainage awareness
- realistic scheduling for North Texas conditions
If you’re dealing with older fencing that’s beyond simple touch-ups, consider a repair-first plan rather than repeating stain every season.
Ready to Improve Your Property’s Security and Appearance?
A well-stained wood fence can look incredible—but the best results come from doing the prep, repair, and timing right. If you’d like help assessing whether your fence just needs staining or needs repair/replacement planning first, our team can guide you toward a durable, long-lasting outcome.
About Fence Pros of Texas
Fence Pros of Texas provides residential fencing, commercial fencing, automatic gates, access control systems, railings, staining, and custom fence installations throughout Plano, TX and surrounding North Texas communities. We focus on durable craftsmanship, long-term property security, curb appeal, and practical guidance that helps homeowners and businesses protect their investment—season after season.
FAQ
How often should I stain a wood fence in Plano?
In North Texas, many homeowners plan on staining every 2–4 years for best color and protection, depending on sun exposure and how much the fence gets rained on. If the fence is mostly shaded or the boards are older and absorb stain quickly, you may need more frequent touch-ups. If your fence shows fading but still feels solid and clean, you may be able to spot-sand and recoat select sections. If you’re seeing peeling, rot, or significant warping, staining alone won’t solve the underlying problem—repairs should come first.
Can I stain my fence the same day I clean it?
You’ll usually want to avoid staining the same day. Even when the surface looks dry, wood can hold moisture inside the fibers. That moisture can lead to blotchiness or reduced bonding. Wait for a consistently dry period and confirm the wood is dry to the touch throughout. If you’re unsure, a small test patch can help, but for a full fence, better drying time typically gives more consistent results.
What’s the biggest reason stain turns out blotchy?
Blotchy staining is most often caused by incomplete cleaning, leftover residue, or uneven moisture absorption. Weathered wood can also absorb stain differently from newer or previously coated boards. Another common cause is staining in harsh heat or direct sun at the wrong time of day, which can make the finish “flash” and set unevenly. The fix is prep-focused: clean properly, sand where needed, let the fence dry fully, and test a small area first.
Should I repair my fence before staining?
Yes—if there are signs of loose rails, failing joints, rot, or soft wood, repair should happen before stain. Staining over unstable framing won’t prevent movement, gaps, or water intrusion. When the structure is solid, stain can do its job: protect the wood surface from moisture and UV wear. In practice, we often recommend a repair-first approach so the finished look lasts longer and doesn’t require repeat work.
Is a wood fence the best option for privacy and security?
Wood can be excellent for privacy, especially when you install solid rails and keep panels properly aligned. However, wood requires more maintenance than some alternatives. If you’re prioritizing low-maintenance security, some homeowners choose metal or mixed-material designs depending on their budget and aesthetic goals. If you’re considering a bigger upgrade, we can help you evaluate options for your property layout and needs—especially around gates and perimeter access.