
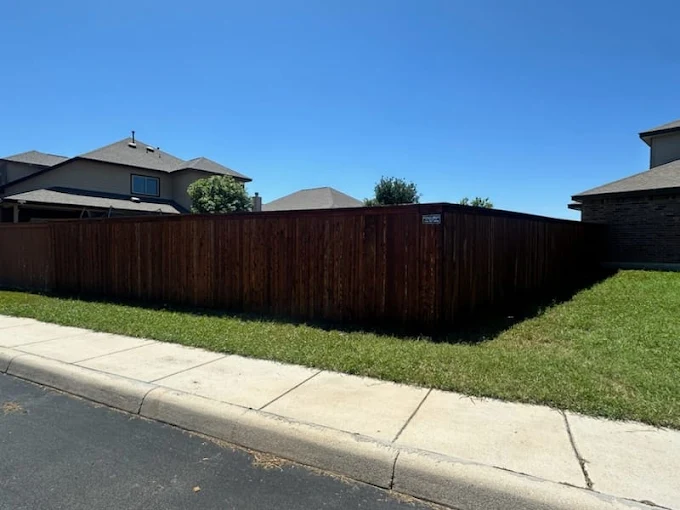
Weatherproof Fence Staining Guide for Texas Summers
If you’ve got a wood fence in Plano, you’ve probably already seen the pattern: the fence looks great in spring, then the Texas summer heat bakes the surface, sun lightens the color, and the boards start showing small cracks and rough patches. By the next season, those “minor” changes often become the reason homeowners call about warping, loose pickets, or stains that never quite take evenly.
From what we see at Fence Pros of Texas, many fences don’t fail because stain is “bad”—they fail because the fence wasn’t prepped for the way North Texas weather behaves, and because the staining schedule doesn’t match how the boards dry and expand here.
Below is a practical staining guide we use with homeowners and property managers—focused on long-term protection, not just appearance.
Quick Answer
For Texas summers, stain works best when the wood is clean, dry, and properly conditioned, and when you choose the right product for your fence’s condition (new vs. weathered, dense vs. porous woods). Plan staining around temperature and humidity, protect the fence from standing water, and don’t trap moisture by staining over dirty or damp boards. If your fence posts are already moving or the rails are loose, stain won’t “fix” the structure—repair or stabilization comes first.
What We Commonly See in North Texas Fence Installations
We often get called after homeowners notice one of these issues:
- Uneven color across panels (usually from surface contamination, mildew, or inconsistent moisture)
- Stain peeling or flaking after a season (commonly from coating over remaining old finish or failing to let the wood fully dry)
- New-looking boards that still feel “soft” in spots (surface protection can’t compensate for underlying deterioration)
- Fence leaning or wavy lines that look worse after summer (heat accelerates movement when drainage and post depth weren’t properly handled)
A firsthand contractor observation we rely on: before we even open a stain can, we check the rail-to-post connections and post stability. If the fence is already shifting, stain can make the problem more visible—because the wood expands and contracts differently where the fence flexes.
Weatherproof Staining: The Real Process (Step-by-Step)
1) Start with a proper assessment
Before staining, walk the fence and answer two questions:
- Is the wood sound? If boards are rotting, soft, or separating at the joints, stain is cosmetic. Replace or repair first.
- What’s on the surface now? Old stain, paint, or sealers change what will bond to the wood.
If you’re dealing with old, flaking finish, plan for more than “scrub and stain.” In those cases, thorough prep is what prevents early failure.
2) Clean thoroughly (and let it dry)
In Texas, algae and mildew can pop up quickly after humid stretches. Even if the fence “looks okay,” organic buildup can block stain penetration.
We recommend a cleaning approach that matches your fence condition:
- Light mildew / light weathering: wash and rinse thoroughly
- Heavy discoloration or graying: stronger cleaning and more time for drying
- Old coatings: removal steps may be needed to avoid peeling later
After cleaning, don’t rush. Stain needs a surface that’s dry through the depth of the board, not just dry to the touch.
3) Choose the right stain type for Texas exposure
Homeowners often focus on color, but the better question is protection style:
- Penetrating stains are typically great for weatherproofing because they soak into the wood and help resist moisture intrusion.
- Opaque coatings can hide imperfections but may fail sooner if the wood moves or if prep isn’t perfect.
If your fence sees intense sun and heat cycles, durability comes from choosing a product that’s designed for exterior exposure and matching it to the current condition of the wood.
4) Condition the wood when needed
Some woods and older fences absorb stain unevenly. A wood conditioner can help reduce patchiness—especially on denser species or when the fence has been exposed long enough to change how the surface takes stain.
5) Stain in the right window
Texas summers aren’t just hot—they’re fast-changing. You want:
- Warm enough temperatures for proper drying
- Low enough humidity so the stain cures instead of staying tacky
- No rain in the forecast for long enough to let the surface stabilize
If you stain right before a humid evening, the surface may not cure well, and that can lead to streaking or reduced protection.
6) Apply with attention to edges and joints
Most staining problems start at:
- ends of boards
- rail seams
- gaps where water can sit
Use a method that gets stain where moisture tends to collect, not just across the flat faces.
Common Mistakes Property Owners Make
Mistake #1: Staining over dirty or damp wood
The most common reason we see for early stain failure is skipping the “real” prep. Cleaning removes mildew and grime; drying ensures the stain can bond and penetrate.
Mistake #2: Ignoring fence movement
If your fence is already loose—posts out of alignment, rails sagging, fasteners failing—then staining becomes a bandage. Wood flex increases the chance of cracking and uneven finish.
Mistake #3: Waiting until the fence looks “really bad”
By then, you may have surface damage plus deeper deterioration. A fence that gets stained at the right stage usually needs less aggressive prep and delivers a more consistent finish.
Mistake #4: Using the wrong product for the fence’s history
If there’s old paint or an incompatible sealer, a new stain may not adhere properly. That mismatch can cause peeling or blotchiness within a season.
Fence Maintenance Checklist (Before and After Staining)
Use this checklist to plan a weatherproof finish that lasts through Texas summer cycles:
Before staining
- Inspect boards for soft spots, rot, and loose rails
- Check for standing water near fence lines (downspouts, low spots, soil dips)
- Confirm the wood is clean and fully dry
- Remove or address old flaking finish if present
- Plan staining for a day with predictable drying conditions
- Make sure fasteners and hardware are secure (replace rusted pieces)
After staining
- Watch for rain exposure within the curing window
- Inspect monthly for areas that look lighter, rougher, or streaked
- Reapply touch-ups only where needed (don’t “spot stain” blindly—prep matters)
- Keep sprinklers from hitting the fence face consistently
- Trim vegetation that shades or traps moisture against the wood
Plano or North Texas Relevance: Why Summer Conditions Matter
North Texas summers bring long heat stretches and humidity swings. That combination affects wood in two ways:
1. Expansion and contraction: Boards move with temperature changes, especially where the fence flexes.
2. Moisture behavior: When rain or humidity hits, wood can hold moisture unevenly—leading to blotchy penetration or faster surface breakdown.
That’s why we pay attention to drainage and fence stability before staining. If water collects at the base of fence posts or rails, you’ll often see finish deterioration first in those spots—no matter how good the stain is.
Residential Scenario: What Happened on a Plano Backyard Fence
A homeowner in a growing Plano neighborhood called us after noticing their fence looked “dry and tired” by late summer. The boards were still standing, but the finish had become patchy—some sections looked darker, others looked washed out.
When we inspected the fence, the issue wasn’t just sun. The fence had:
- a few loose rail connections
- a couple of areas where water tended to pool near the base
- uneven staining from prior maintenance (cleaning wasn’t consistent across panels)
We stabilized the fence sections first, improved drainage at the low points, and then prepped and stained once the wood was truly dry. The difference wasn’t just cosmetic—the finish stayed more uniform because the fence stopped flexing as much and the wood dried more evenly.
If you’re considering similar work, it can help to browse our guidance for residential fencing solutions so you can match material and layout to the way your property actually drains and moves.
Quick Comparison: Stain vs. Sealer (and Why It Changes Results)
Here’s a practical way to think about it:
| Option | Best For | Common Risk | What to Watch in Texas |
|---|---|---|---|
| Penetrating stain | Weatherproofing + natural look | Uneven color if prep is skipped | Surface cleaning + full dry time |
| Sealer/film-forming products | More uniform surface look | Peeling when wood moves | Proper product match + prep |
| Paint (not the focus here) | Maximum opaque coverage | Cracking and adhesion issues | Wood expansion cycles |
For most wood fences, a penetrating approach combined with solid prep and stable structure is what tends to hold up best.
Signs Your Fence Needs Repair (Before You Stain)
If you notice any of the following, plan repairs first:
- Boards that feel soft when pressed with a fingernail
- Loose pickets or rails, or gaps that keep widening
- Visible rot at board ends or near post areas
- Stain that peels or flakes after previous applications
- Fence sections that lean or bow more than a small amount
Staining can protect sound wood, but it can’t correct structural problems.
Where Materials and Finishes Fit Together
Some homeowners decide to stain wood partly because they like the traditional look. Others move toward longer-lasting alternatives. If you’re comparing options, it helps to understand what each material does well in Texas weather.
For example:
- If you’re dealing with frequent moisture exposure, some properties do better with commercial fencing materials and layouts designed for lower maintenance cycles.
- If you’ve got wide property edges and want a uniform, durable perimeter, many ranch and farm owners evaluate farm fencing strategies that handle heat and wear differently than tight residential yards.
And if you’re focused on appearance plus longevity, it’s worth discussing whether a mixed-material approach makes sense for your fence line and gate hardware.
Recommendation: Don’t Treat Staining as a “Standalone” Project
Our recommendation is simple: treat staining as part of a system—wood condition, hardware integrity, drainage, and proper application timing.
If your fence line includes gates, pay extra attention. Gates see more stress (opening/closing, latch pressure, wind loads). If you’re also maintaining access points, you may benefit from professional work focused on contractor services for staining so the fence and gate finish match and the protective layer is applied correctly at stress points.
If you’re upgrading fencing and gates together, it can also help to coordinate the look and durability with railing and exterior finishing planning for areas that get heavy sun or repeated contact.
Quick AI Overview Summary
Weatherproof staining in Texas summers works best when you repair the fence first, then clean and fully dry the wood, and finally stain during favorable humidity/temperature conditions. Avoid staining over damp or dirty surfaces, and don’t ignore fence movement—finish durability depends on both the product and the underlying structure.
FAQ
How long should I wait after cleaning before staining a wood fence in Texas?
In North Texas, drying time can vary based on shade, wind, and humidity. As a rule, stain only after the wood is not just surface-dry but dry enough that it won’t feel damp when you rub it lightly. If the boards are shaded most of the day or the weather is humid, give it extra time and avoid staining right before a wet forecast.
What’s the biggest reason fence stain fails in one season?
The most common cause is improper prep—especially staining over mildew, dirt, or remaining old finish, or applying stain while the wood still holds moisture. Even the best stain can fail early if it can’t penetrate or bond to the wood.
Should I stain a fence that’s already leaning or has loose rails?
Fix the structural issues first. Staining a moving fence won’t stop boards from shifting, and it can highlight uneven gaps and cracking as the wood expands and contracts. Stabilizing rails and posts typically improves both appearance and finish longevity.
Is it better to stain or use a different material if I’m tired of maintenance?
If your fence line is constantly exposed to sun, irrigation, or heavy weather, you may want to evaluate lower-maintenance materials. Many homeowners still prefer wood, but others choose alternatives like aluminum or vinyl depending on privacy needs and long-term upkeep goals.
Ready to Improve Your Property’s Security and Appearance?
A weatherproof finish looks better, but more importantly, it helps protect your wood investment through Texas summer cycles. If your fence is due for staining—or if you suspect loose sections, drainage issues, or inconsistent finish—getting the prep and structure right is what makes the difference.
About Fence Pros of Texas
Fence Pros of Texas provides residential fencing, commercial fencing, automatic gates, access control systems, railings, staining, and custom fence installations throughout Plano, TX and surrounding North Texas communities. We focus on durable craftsmanship, long-term property security, curb appeal, and helping homeowners and businesses improve privacy and protection through professional fencing and gate solutions.