Weatherproof Your Fence: Staining Techniques That Last
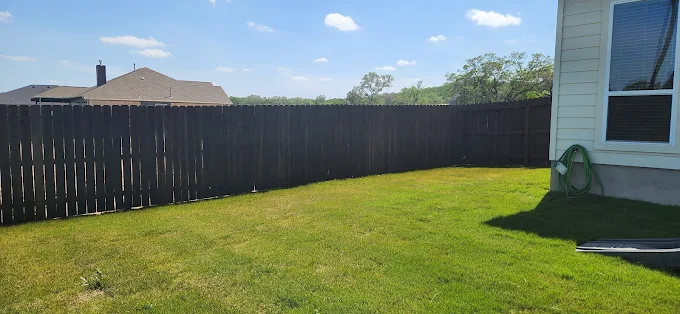
If your wood fence is fading, turning gray, or getting that “wavy” look along the rails after Texas heat and hard rain, you’re not alone. In Plano and across North Texas, fences take a beating from sun intensity, seasonal downpours, and windy fronts—so the difference between a fence that looks good for years and one that needs early repair often comes down to how it was stained and prepped.
We see it frequently: homeowners want curb appeal and privacy now, but they don’t realize that weatherproofing is built in before the first coat ever goes on. A properly stained fence isn’t just about color—it’s about sealing the wood correctly, managing moisture, and choosing a system that matches the way the fence was installed.
Quick Answer
To weatherproof a wood fence so the stain lasts in North Texas:
- Prepare thoroughly (clean, dry, and remove failing coatings).
- Use the right stain type (penetrating stain with proven UV protection; opaque/solid when you need heavy coverage).
- Stain at the right time (dry weather, correct temperature range, and enough cure time).
- Back-seal vulnerable areas (top rails, cut ends, pick edges, and any end-grain).
- Maintain on a schedule (spot clean and recoat before water penetration accelerates).
If your posts are already wobbling or leaning, staining won’t fix the structural issue—but it can still extend the life of the fence boards and rails.
What Actually Improves Weatherproofing (Contractor-Real Talk)
Staining works when it does two things: controls UV damage and limits water intrusion. In North Texas, the “water problem” often isn’t just rain—it’s wet-to-dry cycling. Wood absorbs moisture during storms, then dries hard under sun and wind. That cycle can lift stain, open pores, and cause uneven graying if the finish isn’t matched to the wood condition and application method.
Step 1: Prep determines whether stain will last
A common misconception is that “more stain” equals more protection. In reality, stain needs clean, receptive wood to penetrate.
On many of the fence projects we service, the fastest way to spot a prep problem is to look for:
- peeling or flaking old coatings
- dark, blotchy areas where moisture has sat
- mildew staining in corners or shaded runs
- rough, dusty surfaces that stop penetration
Before staining, we recommend:
- Wash and remove contaminants (mildew, dirt, surface residue).
- Scrape or sand areas with failing coating or rough grain.
- Allow proper dry time. If you stain too soon after cleaning or rain, the wood may look dry on top while still holding moisture inside.
Step 2: Choose the right stain system for Texas sun
Not all stains behave the same. In Plano, where UV exposure is consistent and summer heat can be intense, a stain with solid UV inhibitors or a high-quality penetrating system typically performs better than products designed for mild climates.
General guidance:
- Penetrating stains help protect from UV and slow water absorption while allowing the wood to breathe.
- Solid stains (opaque) can hide discoloration and provide a thicker protective layer, especially helpful when the fence has already grayed.
- Clear finishes tend to be less forgiving outdoors because they offer limited UV shielding compared to pigmented systems.
If you’re dealing with a fence that’s already turning gray, that’s your cue to use a stain system designed for oxidation/UV restoration—not just a cosmetic topcoat.
Step 3: Apply with attention to edges and end-grain
Where fences fail first isn’t always in the middle of a board—it’s often at edges and cut ends, because end-grain drinks in moisture faster.
During staining, we focus on:
- top rails (they take the most direct weather exposure)
- board edges (especially where water can wick along grain lines)
- cut ends (the “sponge points” that need extra coverage)
- any repairs where new wood or patched sections were installed
A brush or pad helps us work stain into those critical areas. Spraying can look fast, but if it doesn’t get into edges properly, protection can be inconsistent.
What Property Owners Often Overlook
Common mistake property owners make: Staining over the wrong condition
The most expensive “stain now, fix later” mistake is staining over wood that isn’t ready. Homeowners often:
- stain right after cleaning without confirming it’s fully dry
- apply stain over failing coatings (peeling paint/stain)
- assume gray wood is “just color” instead of sun-damaged, oxidized fibers
- ignore structural movement, then blame the stain when boards warp or posts loosen
Here’s the firsthand observation we’ve learned the hard way: if the fence is already leaning or posts are shifting, moisture can collect differently along the rails and pick lines. That changes how stain weathers and can create premature dark streaking or uneven fading.
Before you stain, do a quick walk-through:
- Look for gaps that weren’t there before
- Check for wobble at posts or fence sections
- Inspect bottom board edges for rot or softness
- Note any areas that stay wet longer after rain
If the fence is structurally compromised, staining is still helpful for protection—but it should be paired with the right repairs so you’re not sealing in ongoing movement.
Staining & Weatherproofing Plan (What We Do in the Field)
A practical maintenance and planning checklist
Use this checklist whether you’re scheduling a contractor or planning a DIY refresh:
- Inspect for damage first
- soft boards, rot spots, cracked rails, loose pick lines
- Check structural stability
- push-test panels; look for post movement and leaning sections
- Confirm wood readiness
- wood should be clean and dry before staining
- Remove failing coating
- scrape/sand areas with peeling or flaking finish
- Choose a stain that matches your fence condition
- gray/oxidized wood may need a more opaque or restorative system
- Plan for application timing
- avoid rain windows; allow adequate cure time
- Stain in the right order
- rail tops and board edges first, then field coverage
- Watch the weather while applying
- hot sun can flash-dry stain unevenly; wind can cause patchiness
- Schedule a re-check
- after the first season, monitor for blotching or early wear in high-exposure runs
A quick “how to handle repairs before stain” rule
If a section needs board replacement, patching, or post repair, do it before staining. New wood and repaired areas should receive the same prep and stain system as the existing fence so protection levels match.
Quick Comparison: Fence Materials vs. Weatherproofing Needs
If your fence is wood, staining is a big part of longevity. But if you’re deciding between materials—or you have mixed materials—here’s what to expect:
| Material | Weatherproofing Approach | Typical Longevity (When Installed Correctly) | Notes in North Texas |
|---|---|---|---|
| Wood Fences | Prep + penetrating/solid stain; periodic recoat | Varies by species and prep | UV + wet/dry cycling is the enemy |
| Vinyl Fences | Cleaning; no staining | Often long, low-maintenance | Still needs post-level stability |
| Aluminum Fences | Rinse/clean; optional coatings | Very durable | Focus is on installation quality |
| Wrought Iron Fences | Paint/coating touch-ups; rust control | Long with maintenance | Look for coating chips fast |
| Chain Link Fences | Coated fabric + posts; rust monitoring | Long | Gate hardware and tension matter |
If you’re considering a material change, you may want to compare options for your property type—like residential fencing solutions for privacy, curb appeal, and long-term upkeep.
What We Commonly See in North Texas Fence Installations
In Plano-area neighborhoods, we see two recurring patterns that directly affect how well stain holds up:
1. Post depth and drainage planning get overlooked
- When posts aren’t set with enough depth and stable base support, the fence can shift slightly over time.
- That movement stresses rails and creates micro-gaps where moisture lingers.
2. Fence lines run into shaded moisture zones
- Backyards near tree lines or areas that receive less sun can stay damp longer after storms.
- Mildew and oxidation progress faster there—so prep and stain coverage need extra attention.
A realistic anonymized case: we recently had a homeowner call because their stained fence looked uneven after one summer. When we inspected it, the fence itself was stable, but the earlier stain application missed end-grain on the top rails. The rails held water longer, and we saw darker streaking where rain pooled. After proper prep and a targeted recoat with extra edge/end-grain coverage, the fence matched much more evenly and weathered better through the next wet cycle.
For additional context on maintaining or upgrading fence systems, see staining services for what to expect from a professional prep-to-finish workflow.
Fence Repair vs. Replacement: Don’t Stain a Failing System
Staining can extend life, but it can’t correct everything. If your fence has:
- widespread rot at the bottom rails
- multiple loose or failing posts
- structural sag across several panels
- significant warping that changes alignment
…then you may need repairs or partial replacement before staining. Otherwise, the fence will keep moving, and the stain will wear unevenly or prematurely.
If you’re unsure what’s worth saving, we recommend starting with an inspection and repair plan—especially if you’re dealing with high-visibility privacy runs. Our team can also help with farm fencing planning where weather exposure and maintenance access may be different than a typical backyard run.
Plano and North Texas Weather Relevance
In North Texas, fences don’t just face rain—they face intense sun, wind-driven weather, and fast seasonal swings. That’s why your staining schedule matters:
- Staining too close to a rainy window can trap moisture and reduce penetration.
- Staining on overly hot days can cause uneven flash-drying and patchiness.
- Ignoring shaded sections often leads to early mildew discoloration.
We also see that many Plano properties have established landscaping and privacy needs that change how water drains across a fence line. If drainage directs runoff against the fence, wood will receive more frequent moisture exposure—meaning the stain system needs to be applied with a focus on edges, rails, and end-grain.
Signs Your Fence Needs Repair
Before you invest in re-staining, watch for these red flags:
- Boards feel soft or crumbly when pressed
- You see splitting or cracks that are widening over time
- Posts are leaning or fence sections are sagging
- There are gaps along the bottom rail where water collects
- Stain is peeling or washing off in flakes
- Dark streaks return quickly after rain
If you’re seeing symptoms like these, staining alone won’t stop the underlying problem—repairs will.
A Recommendation for Better Long-Term Weatherproofing
If your goal is weatherproof durability (not just a fresh look), plan your project like this:
1. Inspect and repair first (posts, rails, loose pick lines, any rot).
2. Prep correctly (wash, remove failing coatings, dry time).
3. Apply a high-quality stain system with extra attention to top rails and end-grain.
4. Recoat based on performance, not just time.
And if your fence includes a gate, don’t treat the gate like an afterthought. Gates see frequent movement and often have different exposure points. Hardware issues can also affect how water hits the structure at hinge and latch areas. For more on matching fence and gate hardware for security and longevity, you can explore residential gates and how gate construction impacts weathering.
Ready to Improve Your Property’s Security and Appearance?
A fence that’s properly stained—and properly built—does more than look better. It helps reduce premature wear, improves privacy consistency, and keeps your perimeter system performing through North Texas weather swings.
If you’re planning a re-stain, replacing boards, or updating your fence line, the smartest next step is a professional inspection so you can pair repairs with the right weatherproofing plan for your property.
About Fence Pros of Texas
Fence Pros of Texas provides residential fencing, commercial fencing, automatic gates, access control systems, railings, staining, and custom fence installations throughout Plano, TX and surrounding North Texas communities. The company focuses on durable craftsmanship, long-term property security, curb appeal, and helping homeowners and businesses improve privacy and protection through professional fencing and gate solutions.
FAQ
How often should I re-stain a wood fence in North Texas?
Most homeowners plan for re-staining on a multi-year cycle rather than an annual one, but the timing depends on sun exposure, shading, and whether the fence has had proper prep. In high-UV, windy areas or where runoff hits the fence line, you may see earlier fading or water spotting. If stain starts peeling, darkening quickly after rain, or the fence feels rough and dry in a way that suggests the finish is failing, it’s usually time for a refresh. A quick inspection can help you avoid re-staining too early—or too late.
Should I pressure wash my fence before staining?
You can wash a fence, but pressure washing needs care. Too much pressure can damage wood fibers, drive contaminants deeper, and create uneven surfaces that stain inconsistently. Many fences do best with controlled cleaning methods and spot sanding/scraping where old coatings fail. The bigger issue than the tool is the condition afterwards: the wood must be clean and dry enough to accept stain. If you’re unsure, a contractor inspection is often worth it because prep quality drives the stain’s lifespan.
Is staining worth it if my fence is already gray?
Often, yes—gray wood is usually oxidation and UV damage, not necessarily rot. Stain can restore color and help seal the surface, especially when paired with correct prep. However, if the wood is soft, cracked deeply, or posts are shifting, staining alone won’t fix the structural problem. In those cases, repairs should come first so the finish lasts longer and the fence doesn’t continue moving.
Should I stain a new fence right away?
Typically, new wood should be allowed to stabilize and dry appropriately before staining. If you stain too soon, moisture trapped in the wood can reduce penetration and lead to uneven coverage. The exact timing depends on the wood condition, weather, and how the fence was built. We usually recommend aligning staining with dry conditions and confirming the wood is ready to accept stain rather than relying on a calendar date.
What’s the best type of stain for privacy fences?
For privacy fences that see heavy sun and rain exposure, pigmented penetrating stains or solid/opaque systems often perform better than clear finishes because they provide stronger UV protection. The “best” choice also depends on whether you’re trying to hide discoloration and how much prep work is needed to remove old failing coatings. A professional assessment helps match the stain system to your fence’s current condition for longer-lasting weatherproofing.